Saving database
You can save your Handy Password database at any time while working with the application. You can save the database locally or to your mailbox. If you want to save your database to your mailbox , see Database on email server. Even if you already have a database saved locally you can still save the database to another location on your local computer or your mail server.
You can save your Handy Password database in four different ways described below:
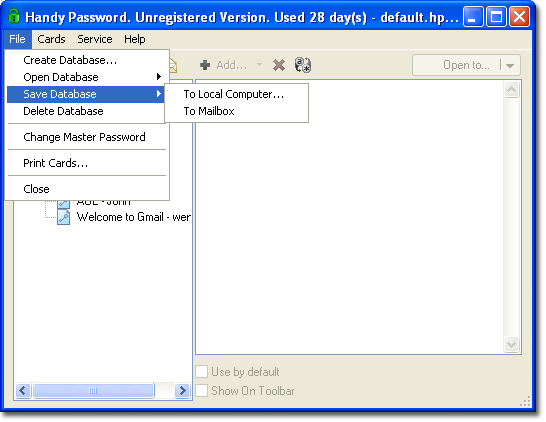
1. Launch Handy Password application and in the File drop-down menu, select the Save database item.

Choose the location where you would like to save your database i.e. local computer or your mailbox.
You may also save your database to a USB flash drive and use it with the Handy Password USB version.
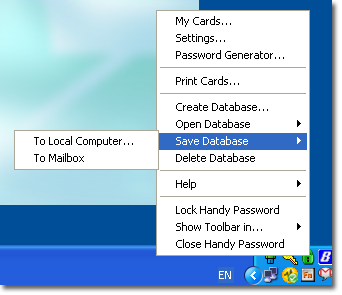
2. Another way to save the database is to right-click the tray icon of Handy Password.

In the pop-up list that appears, select the Save Database item and choose the destination: local computer or mailbox.
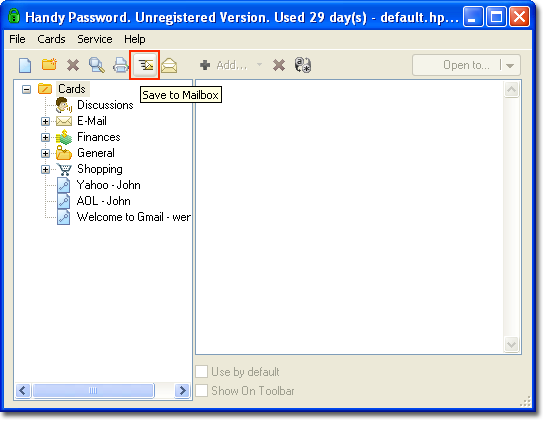
3. Another way to save your Handy Password to the mailbox is to click the Save to mailbox item on the application toolbar

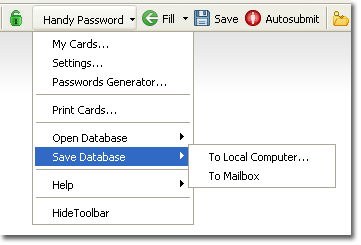
4. Still another way to save the database is to click the Handy Password tab on the browser toolbar.

Select the Save Database item from the drop-down list and choose the destination for your database: local computer or mailbox.
To save the database locally, click the To Local Computer item. The Save as dialog box will appear. Specify a local directory and the name of your database and click OK. You will be able to use this database on a local computer only.
If you choose to store your database on the email server, select the To Mailbox item. Specify the mail server settings as described here. With the database in your mailbox, you can use Handy Password on any computer connected to the Internet.
Database storage
To see where your default database is stored, do the following:
1. In the main window of the program, click the Service menu item.
2. Select Settings from the drop-down list.
3. In the Handy Password: Settings dialog that appears, click on "plus" next to Data storage, and select the Local computer item.
4. In the right part of the Handy Password: Settings dialog, you will see the local database directory.
Exporting Database From Email Server
 |  |  |


