Database on email server
Handy Password has an option to keep your database on the email server. Now let us see how this is useful. When you keep the database on the email server you can use online password storage on any computer you want and not only your local PC. All you have to do is download the database from the email server and install Handy Password on the computer you happen to work on at the time.†
If you want to be able to use Handy Backup on any machine with the Internet connection, check the box My mailbox and click Next.
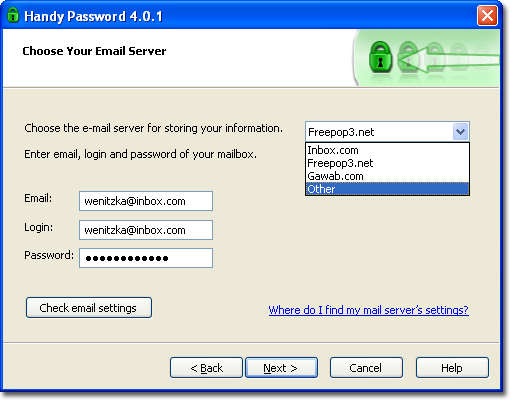
In the next step, you should choose your email server. The following servers are available: Inbox.com, Freepop3.net, Gawab.com. If you have a mail box in one of these servers, select this server from the drop-down list and enter the login and password for your account. Click the Check email settings tab to make sure your email settings are correct. If the email settings are NOT correct Handy Password will create the database locally. Click Next to continue.
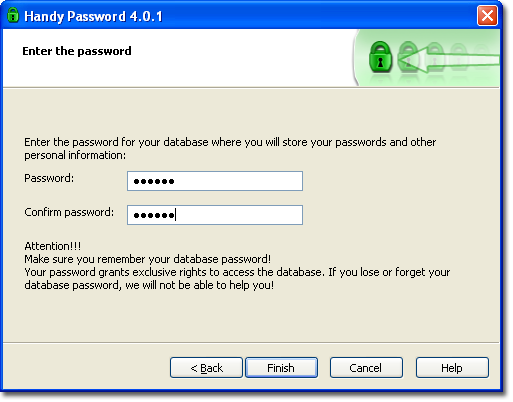
In the next step, enter the password for your database and replicate it in the Confirm password field. Click Ready. The database will be stored in your email account and you will receive a notification letter informing you that you have a Handy Password database in you account. Make sure you keep the letter and the database itself in your mailbox and not accidentally delete it; otherwise you wonít be able to use Handy Password!
†
If you donít have a mailbox in any of the three available mail servers select Other from the drop-down list. In the next step, you should adjust the settings of you email server such as domain, login, password, incoming server, and outgoing server.
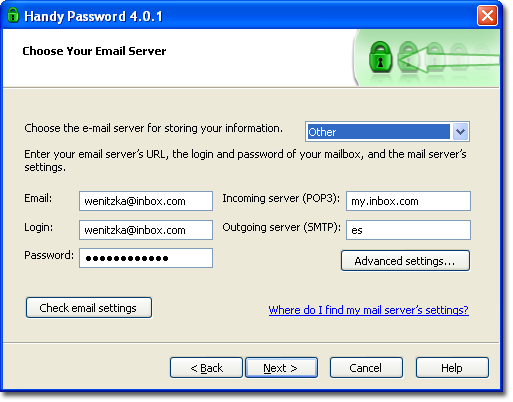
When you have entered the mail server settings, click the Check email settings tab to check if you have entered correct settings of you email server. If the settings are correct you can proceed to the next step of database creation. If the email server settings are NOT correct, you can still proceed with the database creation, however the database will be saved locally.
If you email server has specific settings, click the Advanced settings tab where you can specify the advanced settings of your email server. For more information on how to adjust email server settings, refer here.
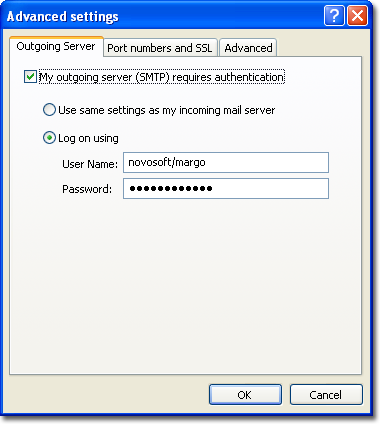
After you have specified the email server settings, click Next to continue.
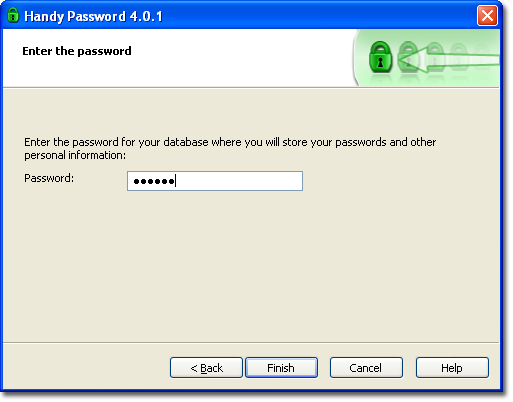
Enter the password for your database and click Ready. The database will be saved to your email server. Once you have saved your database to the email server, you can download it anytime and use Handy Password to any computer.
 |  |  |


